
TOP 10 “Must-Know” Tips For a Better Power Rack Workout
Make no mistake!
A power rack is a hefty investment.
But…
You simply can’t beat the strength gaining opportunity and safety of a power rack!
A power rack will replace several individual pieces of equipment, saving you money in the long run.
More important than that, power racks make lifting heavy alone safer.
A power rack provides you to opportunity for a pro-level workout from home, without a spotter.
With that in mind, I am here to give you my 10 must-know tips for a better power rack workout so you can get the most from your cage.
I won’t waste your time, let’s get right to it!
Contents
Master the Big 3 Lifts
Big Lift #1 the Deadlift
Read any weightlifting forum or spend some time if the weight room at your local gym and you will quickly learn that everyone will tell you to deadlift in a different way.
Some people wing it, determining what’s most comfortable for them.
But there is a problem with this method…
Doing your deadlifts the wrong way is not only dangerous, but it could be preventing you from seeing the results you want.
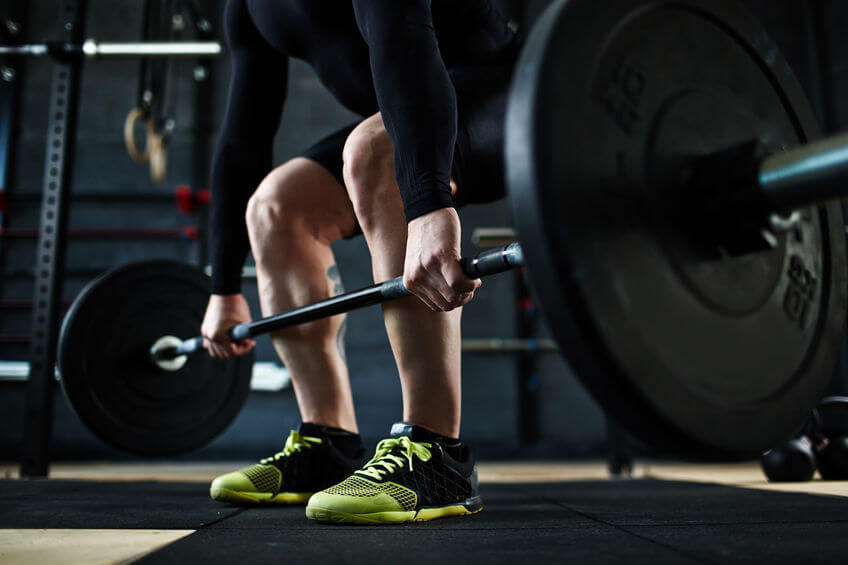
- There are a few different ways to do a deadlift. A traditional deadlift is done lifting the weight from the floor, and is performed outside your power cage.
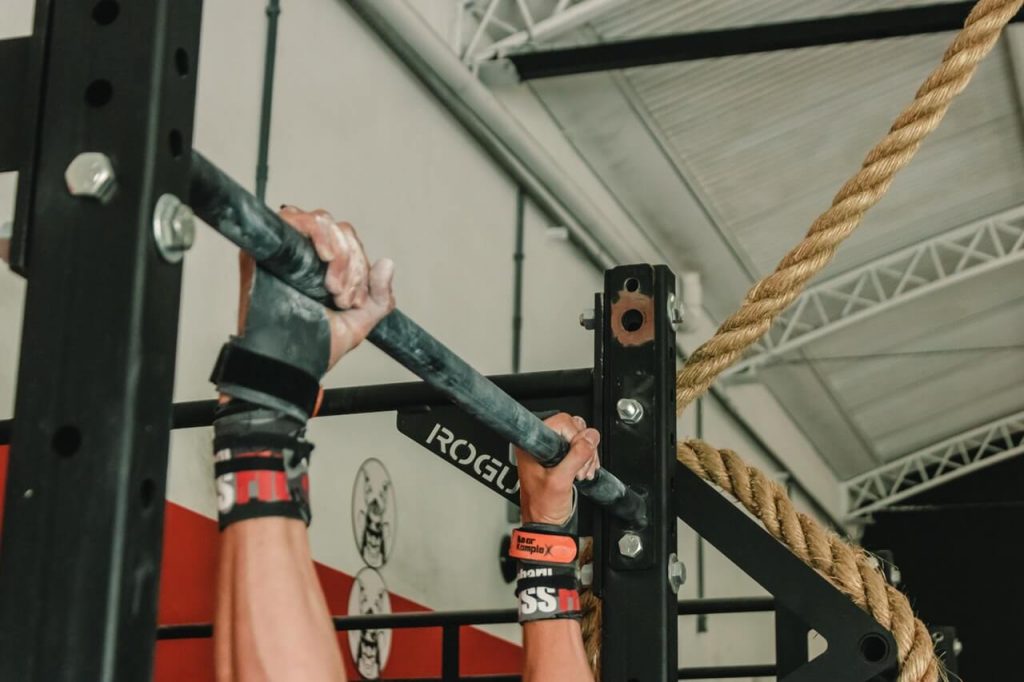
- The second type of deadlift is called a rack pull because it is a deadlift variation performed from the lower bars of your rack.
Why Use a Rack Pull vs a Deadlift?
A rack pull allows you to strengthen your hips and back without the added stress of pulling all the way from the floor.
In my opinion, both rack pulls and proper deadlifts are important to any lifting routine. Rack pulls allow you to focus more on strength, and proper deadlifts force you to work through the entire range of motion.
Even though you will probably be able to lift more with a rack pull than a deadlift, you should be using both exercises.
How to Deadlift From the Floor
- Stand with feet hip width apart, feet centered under the bar to the point your laces are showing on the other side of the bar.
- Grip the bar in a double overhand grip, shoulder width apart, or just outside your feet.
- DO NOT flex your elbow in this move. You must keep this in mind as you lift.
- Lower yourself until your shins touch the bar.
- Drive your hips down, and your chest up and out, head up.
- Keep your back straight, NO ROUNDING!
- Lift, staring with engaging your leg muscles, after a certain height, you engage hip and back muscles and posterior chain.
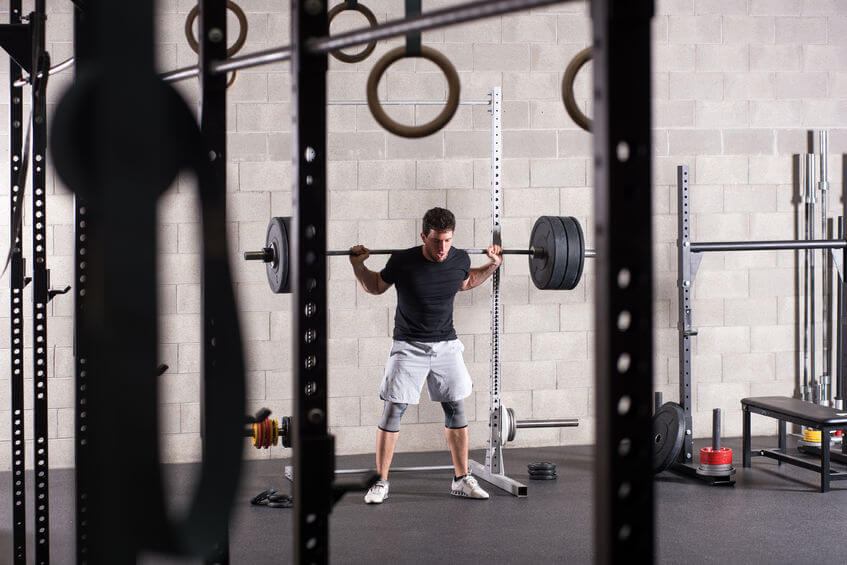
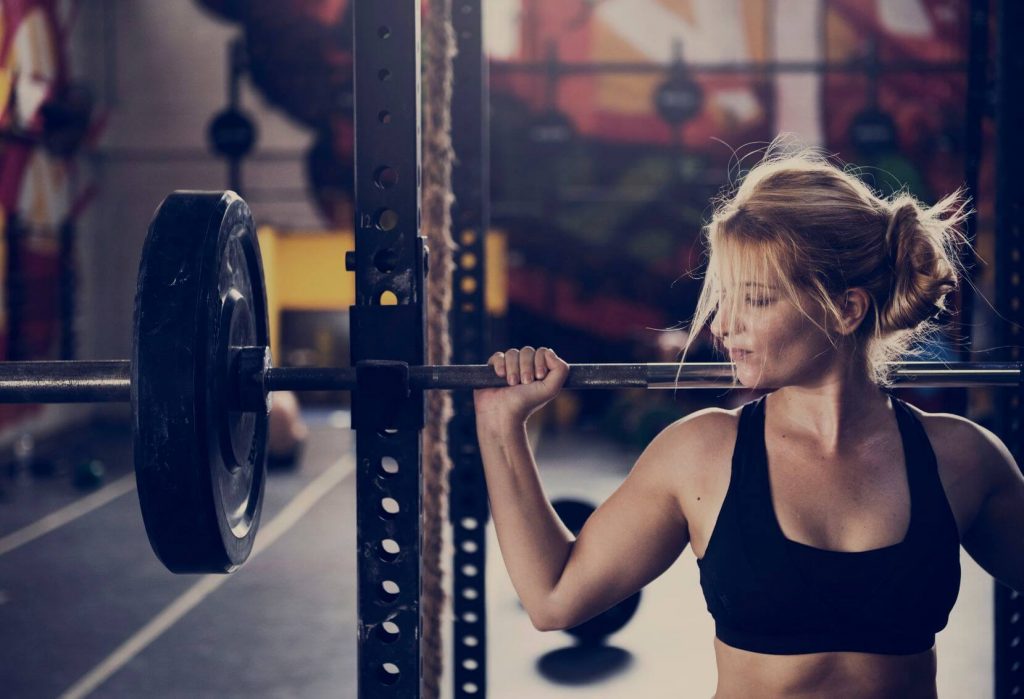
Big Lift #2 the Squat
A squat is one of the most important exercises you can do, and a squat rack or power cage is a necessity. Squats are likely among one of the top 3 reasons you bought a power rack in the first place.
Many lifters use a high bar squat, but what about low bar squats?
Changing up your squat game can help you increase the amount you’re lifting.
Note: A high bar squat places the bar across the top of the traps. The Low bar squat places the bar lower on the back.
With a low bar squat, since you’re getting better leverage, it’s safer for you to up the amount of weight you use when you’re lifting low bar, which is the same way powerlifters do it.
The key to a low bar squat is mastering your stance. You need to keep your upper back nice and tight, with the bar evenly spaced behind you.
Your hands and your forearms should form a perfect line, and you should never use your hands to support the bar. Always aim to keep your thumbs over the bar, rather than under it.
Your chest should be lifted up and pointed forward, and you need to maintain that position.
With your shoulders and elbows down, your knees out, and your shoulders tilted back, move your feet out wide. You’ll want to distribute your weight onto your heels and the center of your foot – never balance on your toes.
If you have a hard time, try curling your toes to prevent you from using them as balance points.
The bar should be low on your back, you need to keep your back as neutral as possible. A very slight curve won’t injure you, but an arched or rounded back can be dangerous.
When you hit the bottom of your squat, propel yourself back up with your gluteal muscles at the same time you raise your chest.
Keep the bar in s straight path and over the center of your foot. The barbell path should not curve or zig zag.
Big Lift #3 the Bench Press
For a bench press, a decent bench is a must.
If you invest in a power rack, you should invest in a bench too. You probably already have one, so let’s get into Bench pressing.
The Official Bench Press Check List
- Place your bench inside your rack, so the bench top edge is 5 to 6 inches beyond the bar.
- Load the bar while it is racked in the cage.
- Make sure the bar is perfectly centered in the rack.
- Lay on the bench and position yourself so your eyes are directly under the bar.
- Grip the bar while your elbows are about 75 degrees from your body.
- Your grip should sit low in the palm, come from underneath, so your forearm supports the weight, not your wrist.
- Lift up and extend your elbows, making sure the bar path stays over your chest.
- Keep your feet, knees bent and feet flat on the ground.
- Keep your shoulders down and tighten your abs during the lift.

Be a Man, or Woman, with a Plan
Define Your Vision First
It’s great that you invested in a power rack. This power rack represents potential.
But…
It is not until you actually use the power rack in a logical, consistent and planned way that the power rack transforms from mere potential into the tool you use to make your goals reality.
And you will never have that reality unless you know what that goal LOOKS LIKE. You must define it.
Hot Tip: Goals should be focused on PROGRESS, not mere numbers.
Develop a Plan for Lifting
Don’t go into lifting with a bro-plan or worse, random exercises. Use a tried and true plan.
Here are a few good weightlifting plans:
5×5 fitness Strong Lifts
5×5 Strong lifts is a simple, easy to remember routine that has you lifting just 3 times a week. It builds a balance physique, both upper and lower body.
The program is excellent for beginners and focuses on building both strength and mass. Plus this plan is free and easily found on the internet at the link above.
Jim Wendler’s 5/3/1
Jim Wendler’s program is another great starting point. This book lays out a routine that has three goals: size, strength and speed.
It incorporates the main lifts, large compound lifts, sustainable progression, so you are always working towards more, and flexibility and mobility.
This plan also looks at diet, which is important to virtually all fitness goals.
Tactical Barbell
Tactical barbell is a weight lifting program for combat soldiers, military and first responders like firemen and police who operate is stressful and often dangerous situations. The routine allows you to prepare yourself for real-life situations you likely encounter on the job.Tactical barbell is one of the only lifting routines that focuses specifically on tactical athletes.
P.H.U.L
P.H.U.L, or Power Hypertrophy Upper Lower, is a plan that can be found here. It is a 4-day split routine spanning 12 weeks that covers both strength and size.
It uses compound lifts, with two days of strength gaining powerlifting and 2 days of muscle bulking hypertrophy exercises.
Mark Rippetoe’s Starting Strength
Mark Rippetoe’s starting strength is a proven beginner routine. The book provides detailed instructions and valuable illustrations on how to correctly perform each lift.
The routine and book are scientifically tested and adjusted and the program is laid out well and easy to follow.
If you want to read Mark’s book you can buy it here.
Thinking Outside of the Rack
Your performance inside the cage depends on how you treat yourself outside the cage.
In addition to that…
Your performance inside the rack translates to benefits outside the rack.
Take these points to heart:
- Form and performing exercises correctly are Job #1 Tendons and tears take MUCH longer to recover from than sore muscles.
- Sleep and recovery time are just as important to plan for as the workout itself.
- Follow a consistent lifting routine where you progress every week, and you will find you become proud of your body, how it looks and what it is capable of. You may want to start wearing more flattering clothes and it often leads to better self-care in general.
- Lifting makes you more aware of your body, how it functions and moves. You will find yourself wanting to try new physical challenges, skills and tasks as your physical prowess grows.
- Any anxiety and depression you may have will diminish or may even go away completely. I hear this time and time again. Exercise is the most natural, and one of the most effective anti-depressants known to man, and you are about to discover that.
- Lifting is a real sport that requires planning, thinking, learning and skill. If you want to progress, understand it’s just as much a mind game as it is a muscle challenge. Approach it like the real sport that it is, and the discipline and mental fortitude you develop inside the weight room will overflow to other aspects of your life.
If you don’t have a power rack yet, but are still in the research phase, check out my top power rack reviews here.
Your Diet is Just as Important as Your Routine in Meeting Goals
As important a tool as your power rack is, I think I have demonstrated how important other factors are too. Your chosen routine, your mindset and how you treat your body outside the weight room all play into your success.
With that said…
Make sure your diet is on point!
I am not going to prescribe a diet here, because choosing the right diet is as personal as choosing your routine.
Some people use Keto, others Vegan, some people insist meal prepping is the way to go, while others use online meal planners. It’s totally up to you.
Whatever you choose, the important thing is that you do in fact choose something that moves you toward your goal and that you stay consistent.
The Finer Points for Getting the Most From Your Power Rack
Never Skip Your Warm-up
Never jump right into your power rack cold.
One of the biggest mistakes new athletes make is that once they become comfortable with their workout, they can jump right into without a warm-up.
The truth is – a warm-up is necessary
It doesn’t matter if you’re in great shape or what sport you perform – before you work out, you need to warm up.
If your muscles aren’t primed, you’re more likely to cause damage than you are to build definition. This can cause complications and injury will slow your progress.
Set aside at least ten minutes for a short warm-up before you start.
Get the Most by Using Add-ons and Accessories
Once you get the basics down, don’t forget that you bought a power rack because of what it can do.
Power rack add-ons are a great way to get even more from your power rack.
Some of the best Power Rack Add-ons and accessories are:
Land Mines
Land mines are power rack attachments that allow you to place your barbell in one end and lift the other.
The landmine pivots in many directions, yet provides a stable base to lift your barbell in many different ways, including twists, rows, presses and pulls.
Landmines are one of the best power rack attachments you can invest in.
Viking Press
The Viking press is designed to be used with your barbell and landmine attachment. It goes on the free end of the barbell and allows you to perform rows, presses and pulls using several different hand grips.
Why use different hand grips?
Different grips activate the muscle from different angles, allowing you to work the muscle more fully and developing the full potential of the muscle. Multiple grips also allow for more functional fitness.
After all, in real life you need to grip things from different angles, right?
Matador aka Dip Station
A dip station added to your power rack opens up a whole new set of exercises you can do from your power rack.
Instead of buying a power tower or dip rack, you can save money and space by attaching a dip station right to your rig.
Multi Grips
Attach a set of multi grips to your rack to add versatility to your routine. Multi grips can be attached high, for pull ups and such. Or attach them at mid-level and use for dips.
These multi grips allow for different grip angles for well-rounded muscle building.
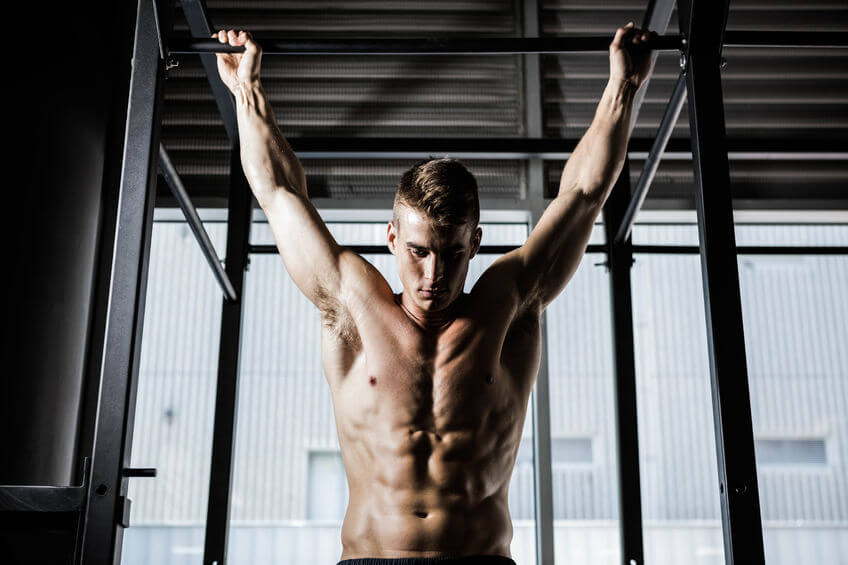
Multi-Grip Pull Up Bar
Most good racks and rigs have a decent pull up bar.
However…
Few have a multi-grip pull up bar. Maybe you do not need a multi-grip pull up bar if you are just starting out, but as you progress you will benefit from the multi-grip angles this bar offers.
Incorporate Bodyweight Exercises
You probably got a rack to lift weights not do bodyweight exercises. I get that.
But hear me out.
Bodyweight excesses are often not associated with power racks and cages. But you should incorporate bodyweight exercises into your routine, and your rig is a great place to perform these bodyweight exercises.
Incorporating bodyweight exercises into your routine increases the versatility of the rack by increasing what you can do with your rack.
Bodyweight exercises allow you to add strength in a unique way that cannot be done using barbells and weights, making you a more well-rounded athlete.
Bodyweight exercises increase your functional fitness, and allow you to be more capable of performing activities outside the gym.
Here’s how to use your rack for bodyweight exercises:
As I said before, a GOOD power rack has a pull up bar. A pull up bar is the star of the show when it comes to bodyweight exercises.
Your racks pull up bar can be used for
- Pull ups (duh)
- Chin ups
- Knee raises
- Front levers
- Toes to the bar
- L hangs
- Grip strength training
- And tons more
Want to learn more about bodyweight fitness? We wrote the guide! Check it out here.
Power Rack FAQs
These rack FAQs will answer the pressing questions you have about your power rack
What are the Most Important Points to Consider when Buying a Power Rack?
Before you pull the trigger on your power rack purchase, carefully consider these three important points.
Safety
Safety is the most important consideration, and the best reason to get a power rack. A GOOD power rack allows you to lift safely and without a spotter.
Your power rack must-have safety spotter bars, spotter arms or safety straps that catch the barbell in the event you fail a lift.
Your power rack must have strong welds and be well built. Look for high gauge steel, well done, carefully welded joints, and other marks of quality.
Ideally, you should be able to anchor the rack to the floor.
Weight Limit
A power rack should be able to hold at least 700 lbs or more. The rack must be able to hold a loaded barbell, no problem.
In addition to that, the rack must be able to withstand the weight of that loaded barbell being dropped onto the safeties.
Since safety is the most important consideration, do not settle for a low capacity rack or rig.
Hole Spacing
The spacing increment between the adjustment holes on your rig should ideally be 1 inch apart. Some rigs have spacing 2 holes apart, and while this does not compromise safety, it can limit the versatility of the rig.
When you are using the power rack, these small adjustments are important and need to be precise so you can get the best lifting form.
Let’s say you are doing a bench press, and the holes are spaced two inches apart and this forces you to place the J-cups too high or too low. In this case, you are forced to start the press too high or low, which throws off form and won’t allow you to get the full range of motion of the press.
What are the Best Power Racks Available?
Glad you asked. I wrote some reviews of the best power racks here.
How Much do Power Racks Cost?
You can get a solid budget-priced power rack for between 350 and 400 dollars. Finer power racks can cost anywhere from 900 dollars on up.
I would not spend less than about 350 dollars on a power rack because you get what you pay for, and all the racks I have seen for less than 350 dollars are not of a quality I would want in my home gym.
What is a Half Rack?
Half racks are racks that take up less floor space and usually cost less than full racks. Half racks are not as wide, and especially not as deep as a full rack.
It usually has one overhead pull up bar. Athletes usually choose half racks when space is limited in their home gym.
What is the Difference Between a Squat Rack vs a Power Rack?
Sometimes the name power rack and squat rack are used interchangeably. After all, a power rack is perfectly suited for squats.
However, there are some pieces of equipment that folks call squat racks, but are more accurately described as squat stands.
Squat stands are two posts that hold a barbell in position. If you want more details, and the full story of power racks vs squat racks check out this informative article.
Summary
I hope this gives you some idea of how to get the most out of your power rack, rig or cage.
If you still haven’t decided on the best power rack, I wrote a collection of the best power rack reviews for you to check out here.
Love garage gym gear? So do we!
Don’t miss another gear review or garage gym news by signing up for the Garage Gym Power newsletter.